Deck Installation Process
Below is the installation process for The Ipe Clip® Hidden Deck Fastener System. The Ipe Clip® Hidden Deck Fastener System is a side mounted hidden deck fastener system. To read more about the differences in hidden deck fastener systems please visit our Hidden Deck Fasteners page.
Ipe Clip® Hidden Deck Fastener System Installation Process
Tools Required
- Caulk gun & exterior construction adhesive
- Used as a leveling agent for uneven joists.
- Electric Screw Gun
- Used to drill pilot holes and for installing the stainless steel screws.
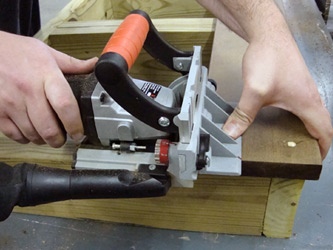
- Biscuit Jointer*
- Used to make a slot in the edge of the deck boards to allow insertion of the Ipe Clip® fasteners. (common cabinet maker tool, available at most hardware stores & home centers)
- Router*
- Can be used if you do not have access to a biscuit jointer, a #20 biscuit cutting router bit (also called a 5/32” slot cutting bit) will work fine. This method is actually preferred by some installers.
*Note: Pre-grooved decking is now widely available from most decking suppliers. This eliminates the need to cut slots using a biscuit jointer or router.
**Photo to the left is from a different installation to show an example of installing a composite decking board…**
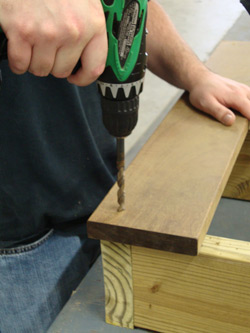 |
Step 1: Installing the Initial BoardApply a bead of exterior construction adhesive along each joist, approximately 3/8″ in width. (This is an optional step, but it is recommended) Use a 1/8″ drill bit with a 3/8″ countersink to pre-drill a hole for the initial face driven screws. A 1/8″ High Speed Drill Bit is included in all Ipe Clip® Hidden Deck Fastener complete systems. |
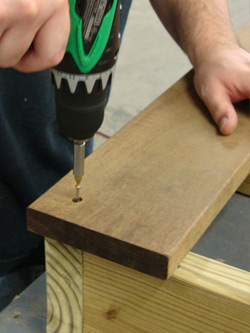 |
Step 2: Installing the Initial Board (cont’d)Use a screw gun to install the initial face screws for the first board. All Ipe Clip® Hidden Deck Fastener systems contain Stainless Steel Torx Drive Screws included in them. |
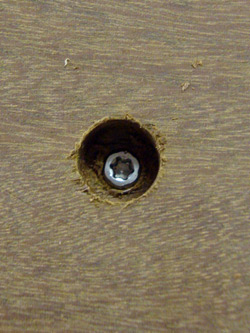 |
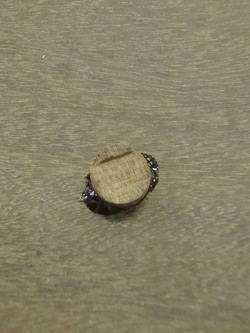
Step 3a: Plugging the face screwed boardsThe picture to the left shows a face screwed deck board with a trim head screw in a countersunk hole. As u can tell in the picture the head of the screw sits below the deck surface so a ipe plug can be applied to the countersunk hole. |
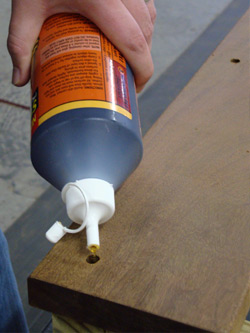 |
Step 3b: Plugging the face screwed boards (cont’d)Apply a small amount of glue in the hole left by the countersunk screw… |
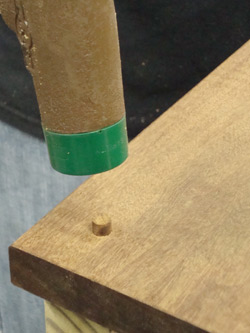 |
Step 3c: Plugging the face screwed boards (cont’d)After applying glue to each countersunk hole, insert an Ipe Clip® 3/8″ Tapered Ipe Plug into each countersunk hole from steps 1 & 2. Use a rubber mallet to make sure the Ipe Plug is firmly inside of each hole. |
 |
Step 3d: Plugging the face screwed boards (cont’d)The picture to the left shows an Ipe Clip® 3/8″ Tapered Ipe Plug that had been properly installed to fill the countersunk hole left be the face fastened screw. |
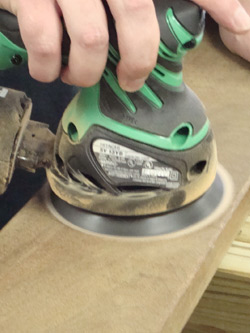 |
Step 3e: Plugging the face screwed boards (cont’d)After the glue on each plug has set, remove any part of the Ipe plug that protrudes above the deck board. You can accomplish this by using a small saw, or a palm sander. |
 |
Step 4: Plugging the face screwed boards (cont’d)After the glue on each plug has set, remove any part of the Ipe plug that protrudes above the deck board. You can accomplish this by using a small saw, or a palm sander. |
 |
Step 5: Plugging the face screwed boards (cont’d)After the glue on each plug has set, remove any part of the Ipe plug that protrudes above the deck board. You can accomplish this by using a small saw, or a palm sander. |
 |
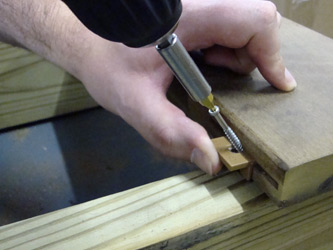
Step 6: Predrill a pilot hole (for hardwood decking only).Drill a 1/8″ pilot hole at a 45° angle through the center of the clip into the bottom edge of the decking board. This needs to be done for each screw when installing Ipe Clip® fasteners on hardwood decking… This is to avoid splintering and to make sure the decking is pulled tight to the joist by the screw in the next step. |
 |
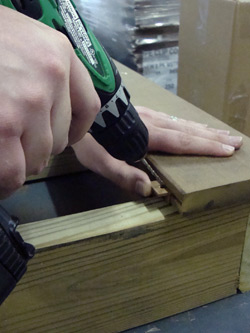
Step 7a: Screwing Ipe Clip® fasteners (Use (a) for hardwood decking.)(a) Run the stainless steel screws at approximately a 45° angle through the hole in the center of the Ipe Clip® fastener, through the deck board, and down into the joist. The head of the screw should be flush with the surface of the Ipe Clip® fastener. Fasten each deck board using one clip and one screw per joist. Where two boards meet on a single joist, only one fastener is needed. As illustrated in the previous step, sometimes it will be necessary to predrill pilot holes for the screws when using denser hardwoods. |
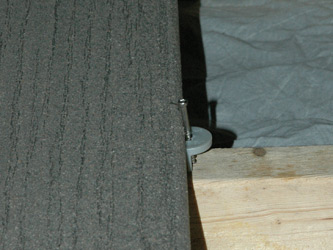 |
Step 7b: Screwing Ipe Clip® fasteners (cont’d) (Use (b) for composite decking.)(b) Run the stainless steel screws straight down through the center of the Ipe Clip® fastener and into the joist. The head of the screw should be flush with the surface of the Ipe Clip® fastener. Fasten each board using one clip and one screw per joist. Where two boards meet on a single joist, only one fastener is needed. |
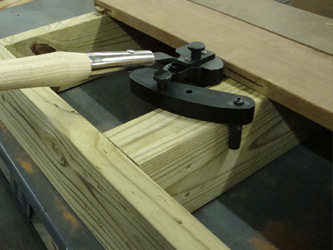 |
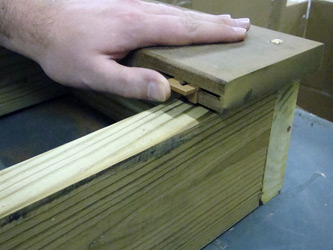
Step 8: Installing deck boards over exposed side of the Ipe Clip® fastener.Again, if pregrooved decking is not being used, use a biscuit jointer or a router to cut a slot into the edge of the next deck board above the joist. Slide this board onto the Ipe Clip® fastener protruding from the previously fastened deck board. When installing a deck you may encounter a “bowed” deck board that is crooked and will not sit straight against the previously installed deck board. The Ipe Clip® Company manufactures the perfect tool to solve this problem. The Hardwood Wrench™ is a deck board straightening tool that is the perfect tool for any deck job. |
| **When using Ipe Clip® ExtremeKD™ fasteners you can use the spacer tools provided to ensure that you do not crush the leg of the fastener while keeping your deck boards tight. Remove spacer tools as soon as deck board is fastened.** | |
| -REPEAT STEPS 2-8 UNTIL ALL DECK BOARDS ARE INSTALLED UP TO THE LAST BOARD- | |
| Step 9: On the last deck board it is necessary to fasten the outside edge by surface screws (in the same manner as the 1st deck board that was installed). These screws can be concealed by countersinking a 3/8” hole and using the wood plugs supplied. It is also recommended to apply a small amount of construction adhesive on the joist for the last deck board. |
Recommended Method of Wood Plug Installation (For 1st and Last Deck Board)
- Drill 3/8” diameter hole approximately 3/8” deep.
- Drill 1/8” pilot hole for the stainless trim head screw.
- Insert screw.
- Put a few drops of glue (Polyurethane based Gorilla Glue® Brand recommended).
- Insert tapered wood plug into hole. Tap slightly with hammer.
- When glue is dry, knock excess plug off with a sharp chisel. Sand smooth so that plug is flush with deck surface. A round, random orbit sander with 80 grit sand paper works best.
Helpful Installation Tips
- Pre-grooved decking is now widely available from most decking suppliers. Purchasing pregrooved decking eliminates the need to cut slots above each joist.
- If the fastener is tipping down when screw is installed, making the next board difficult to install, then stand the screw more vertical. The screw should be installed at approximately a 30° to 45° angle.
- A Hardwood Wrench™ deck board straightening tool is useful to straighten deck boards and maintain consistent joint spacing.
- Do not over tighten screws. They should be flush or slightly above the surface of the Ipe Clip® fastener.
- Assure that wood decking has been acclimated to your climate before installing deck boards. For most decking, one week on the job site should be sufficient to prevent deck boards from excessive shrinkage.
- Use only the stainless fasteners provided with the Ipe Clip® hidden deck fastener system, as other metals may stain your decking.
- We recommend coating the finished installed decking with proper deck finish after installation to reduce any wood shrinkage or movement.
- When installing hardwood decking use an end wax on end grain cuts to help prevent checking.